Please Note! We recommend using the online Strategy Guide to source your campaigns. The Strategy Guide is kept up-to-date with the latest campaigns. This campaign may contain legacy content (e.g, legacy emails, legacy landing pages, etc...)
This article provides instructions for launching the Hard Bounce Re-Engage campaign that you can download for free from the Keap Marketplace.
This campaign is an extension to Hard Bounce Recovery and invites someone to double check their subscription preferences after they provide a working, updated email address.
Download the Hard Bounce Re-Engage campaign from the Marketplace
MODIFY SUBSCRIPTION PREFERENCES FORM
Out of the box, this campaign uses the Main Newsletter custom Drop-down field that comes with our newsletter campaign*. If you are using Tags OR some other custom Drop-down field(s) to segment your subscription list, you'll need to add these other subscriptions to the preferences form before publishing.
* If you are only using the Main Newsetter custom Dropdown field, you may skip this step- Double click the Subscription Preferences Double Check web form
- If you are not using the Main Newsletter custom field, hover over the field and click the Delete
- Add your existing subscriptions to the form
- If you are using custom Dropdown fields to segment your subscriptions:
- Using the Field Snippets ribbon, drag in a new Other snippet
- Configure the snippet for the custom Dropdown field being used for a subscription; click Save
- Repeat steps 1&2 for all subscriptions that are segmented using a custom Dropdown field
- If you are using Tags to segment your subscriptions:
- Using the Field Snippets ribbon, drag in a new Checkbox snippet
- Configure the checkbox label for the subscription
- Click the Tag symbol next to the label and configure it for the Tag being used for the subscription; click Save
- Repeat steps 1-3 for all subscriptions that are segmented using a tag
- If you are using custom Dropdown fields to segment your subscriptions:
- In the upper right of the page, click Back to Campaign
Publish the CAMPAIGN
All items on this campaign are 100% configured upon install which means we can safely Publish the campaign so it can be used.
- In the upper right of the page, click the Publish button
- At the bottom of the checklist, click the Publish button to publish the campaign
Update Existing Hard Bounce Recovery Campaign*
This campaign was designed to work as an extension to the Hard Bounce Recovery Campaign. That campaign's purpose is catch email addresses as they hard bounce so they can be updated. Once an update email has been provided, the campaign you just setup can be triggered automatically.
* You may also use this re-engagement campaign with any other process in your business where someone's email is updated
- Go into the campaign that contains the existing hard bounce recovery process
- Double click into the sequence that removes the hard bounce tag; this should be the sequence connected after the existing internal form goal used for updates
- Using the Process menu on the right of the page, drag in a new Tag step and make sure it is connected to the automation flow

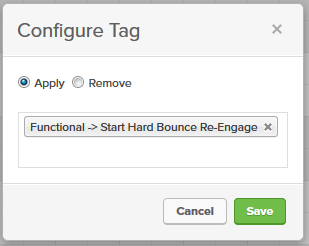
- Update the Tag step to apply the Functional -> Start Hard Bounce Re-Engage tag; click Save
- In the upper left of the page, click Back to Sequence
- In the upper right of the page, click the Publish button
- Click the Publish button at the bottom of this list to publish the updates to this campaign
Now, the next time someone provides a working email address, this re-engagement campaign will automatically start.

