Please note that this feature is only available for Ultimate and Classic editions of Keap
Important Note! This feature does not work when the user is using the Safari web browser. Safari has a setting called "Prevent Cross Site Tracking" enabled by default which prevents this goal from being triggered.
You can trigger automation when an existing contact visits a specific page on your website. After a contact performs one of the following actions, a tracking cookie is placed in their browser:
- Submits a hosted or JavaScript embedded web form
- Submits an order form
- Submits an order via the shopping cart
Trigger automation when a contact visits a web page
- Click and drag a Web Page automation goal onto the canvas

- Double-click the goal or single-click and choose View and edit.

- Click the copy button to copy the script into your computer's clipboard
- (Optional) If you're not ready to use the script now, simply paste it into Note Pad or Text Edit so that you can grab it later
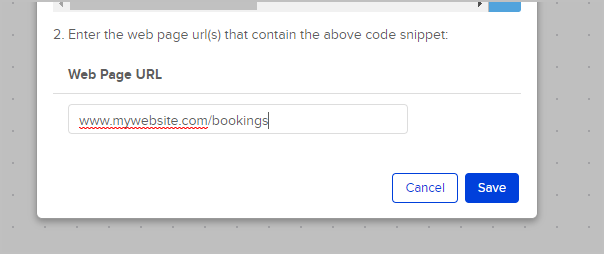
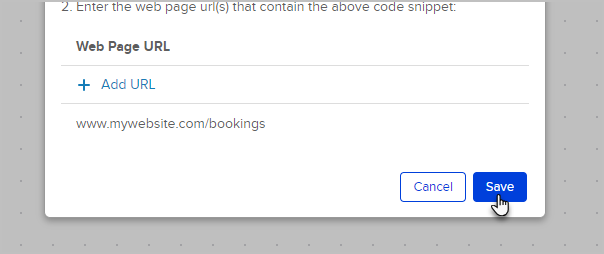
- Click + Add URL and enter the URL of a page you would like to track on your website and hit the enter key to add the URL. You must include "www." prior to the URL for this to function.
- Repeat step 6 until you have entered all of the URLs that you would like to track
- When you're finished, click the Save button
- Now insert the code snippet onto the pages that you want to track. It can be added using any HTML widget (Weebly and WordPress) or inserted anywhere on a custom page. Typically, scripts are placed somewhere inside the <head></head> of an html page, but in this case it doesn't matter where on the page the script is placed.


Pro-Tips!
If you are already using the web tracking code on a page you want to track, you don't need to add this new snippet to the page.
Two conditions must be met in order for the automation to trigger:
- The tracking code must be on the page that the contact visits.
- The tracking cookie exists on the contacts browser.