Test a web form
You can test web forms on-the-fly while you are creating them in the Automation Builder.
- Make sure to publish any changes you've made to the form before you test it.
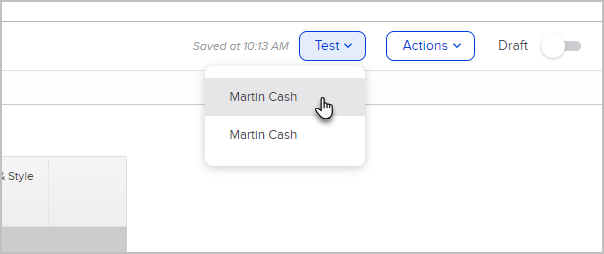
- While viewing the web form, click the Test button at the top of the web form and choose your user record from the drop-down menu.

- Fill out your form and click the Submit button.

- Close the thank you page.
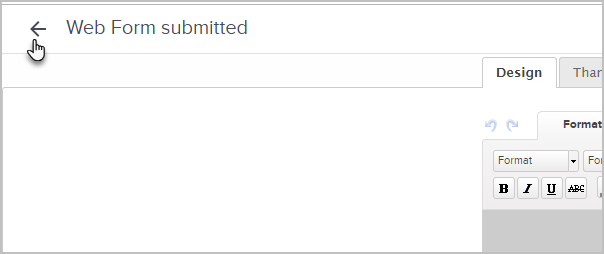
- Click the arrow to go back.

- Click the close button to leave the automation builder.

- Find your contact record in Max Classic, scroll down to the Form Submission section to get details on when the form was submitted and what information was obtained.

Test an Order Form
The easiest way to test an order form is to run an actual transaction with your credit card or PayPal account. If this isn't possible, and you use an Authorize.Net merchant account, you can put the Authorize.Net merchant account into "Simulator" mode and fill out the order form. In simulator mode, all transactions are approved, but no actual financial information is sent through the gateway.
Simulator Mode Warning! Make sure not to leave your Authorize.Net merchant account in Simulator mode! Also, make sure your Authorize.Net merchant account isn't presently active on an existing order form or the shopping cart. In simulator mode, ALL transactions will always be approved!
To test an order form with an Authorize.Net account in "Simulator" mode:
- Go to E-Commerce > E-Commerce Setup in the main navigation menu.
- Click on the Order Forms link.
- Click on the name of the order form you want to test.
- Click the Links tab.
- Click on the link to open the order form.
- Fill out the form using a test credit card number. For example, VISA; 41111111111111111; 01-2025; 123.
- Go to the contact record in Max Classic and make sure the items were added correctly to the order. If the product you purchased is part of a purchase goal in an automation, make sure the goal was accomplished correctly. Also, if you have billing automation set up, check that too!
Test your Shopping Cart
The easiest way to test your shopping cart is to run an actual transaction with your credit card or PayPal account. If this isn't possible, and you use an Authorize.Net merchant account, you can put the Authorize.Net merchant account into "Simulator" mode and fill out the shopping cart. In simulator mode, all transactions are approved, but no actual financial information is sent through the gateway.
Simulator Mode Warning! Make sure not to leave your Authorize.Net merchant account in Simulator mode! Also, make sure your Authorize.Net merchant account isn't presently active on an existing order form or the shopping cart. In simulator mode, ALL transactions will always be approved!
To test your shopping cart with an Authorize.Net account in "Simulator" mode:
- Go to E-Commerce > E-Commerce Setup in the master nav menu.
- Click on the Shopping Cart Themes link.
- Click on the thumbnail of your Active Theme to go to your shopping cart.
- Add items to your cart and checkout.
- Go to the contact record in Max Classic and make sure the items were added correctly to the order. If the product you purchased is part of a purchase goal in an automation, make sure the goal was accomplished correctly. Also, if you have billing automation set up, check that too.
Test an automation
- Go to Marketing > Automation Builder in the main navigation menu.
- Click on the name of the automation you wish to test.
- Complete the goal that begins the automation. For example, if the first goal of the automation is to submit a web form or add a tag, do so now.
- Find the contact in Max Classic you tested with and scroll down the page and click on the Automations tab.
- From here, you can see what automations this contact belongs to as well as all of the individual marketing pieces of the automation.

Test an Email in a Sequence
While viewing the email in the sequence, click the Send a test button and select a user from the drop-down.

Test a Broadcast Email
When sending a broadcast email, you can test the email on-the-fly while you are building it. Just click the Send a test button at the top of the page
Test a Credit Card Processor (Merchant Account)
- Go to E-Commerce > Payments Setup in the main navigation menu.
- Click on the Merchant Accounts link.
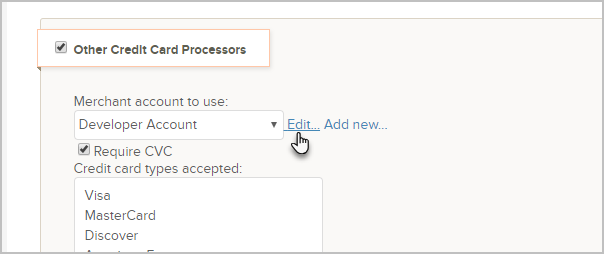
- Click the Edit link next to the merchant account you wish to test

- Make sure the merchant account is in Live Mode.
- Click Save to save your changes (if necessary.)
- Now, you can go to your contact record and create an order using the merchant account you want to test. If successful, you will get an "approved" message from the gateway. If it doesn't work correctly, you will get an error message with an error code.


