Create a standalone Note Template and apply it to a contact record.
- Use note templates to record personal interactions or events related to a contact record.
- Note templates save time by reducing or eliminating manual follow-up changes.
- Note templates can also be used to initiate automation in Campaign Builder.
There are three types of note templates:
- Campaign Goal Note Template: This common note template is set up in Campaign Builder. When applied to a contact, campaign automation begins; it is defined as a Goal in Campaign Builder.
- Campaign Sequence Note Template: This note template is set up in Campaign Builder. It does not initiate automation, it automatically adds a note to the contact record as part of a campaign sequence.
- Standalone Note Template: This note template does not kick-off campaign automation when applied to a contact record and is not set up in Campaign Builder.
Set Up a Standalone Note Template
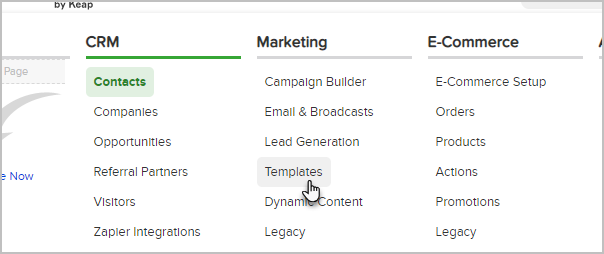
- Go to Marketing > Templates in the main navigation menu.
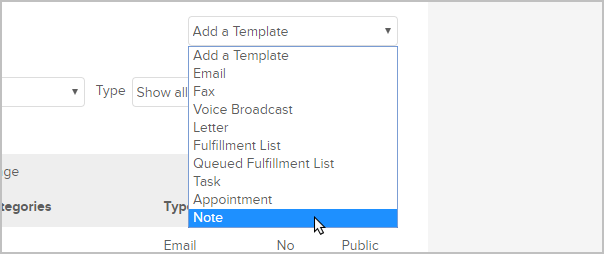
- In the Add a Template drop-down, select Note.
- Enter a short and descriptive note template title so that it is easy to identify.

- Choose a privacy option:
- Public: makes the template accessible to other users.
- Private: hides this template from other users.
- Enter the body of the Note.
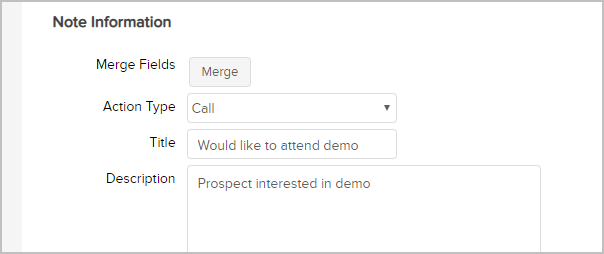
- (Optional) Action Type - Select a note type from the drop-down. You can customize these options in CRM > Settings > Task/Appt/Note Settings.
- Action Description - Enter a brief description summarizing the interaction or event; e.g., Qualifying Call - Voice Message. It is visible in the contact record note history.
- Creation Notes: Enter the details of the interaction or event.
- (Optional) User ID: It defaults to 'Logged In User'. Select an individual if the note template should always be attributed to one specific user.
- (Optional) Notify these Users: Select user(s) who want an email when this note is applied.
- (Optional) Send Notify as Bcc: Check this box if you do not want each notified user to see all of the other users who are notified.
- (Optional) Click the Actions tab to add one or more action to the note template.
- (Optional) Click the Categories and Follow-Up Sequences tab to assign this template to a category. The categories help organize and filter templates.
- (Optional) Click the Misc. Expense tab to assign a cost per person to this template. This is not commonly used with note templates, but can include the cost of materials and labor related to the note event or interaction.
- On the General tab, click Yes to mark the note ready and make it available to users.
- Click Save to create the note template.


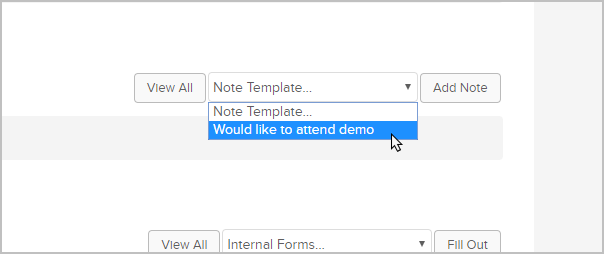
To apply a note template
- Open the contact record, scroll down to the Notes section, and select the note template from the drop-down.
- Click Add Note.