Legacy Notice: This article refers to a feature that used with legacy broadcast emails which are created in Marketing > Templates..
The drag & drop email builder makes it easy for anyone to create branded, professional looking emails. In order to ensure your emails have a consistent look and feel, you should start by creating your branded templates in the branding center first. After you've created your branded templates, all new emails you create will retain the same look and feel.
Compatibility Note: The drag & drop builder is not compatible with the code builder (or classic builder). If you create an email using the drag & drop builder, you should continue editing it with the drag & drop builder tools. If you convert an email to the code or classic builder, you will not be able to return to the drag & drop builder for future editing. Click here to learn more about legacy email builders
To get started, let's look at a couple of features that will help you design a great looking email...
- Snippets: Use the drag & drop snippets to construct the email body and move them around to adjust the way the content is organized.
- Layout: The layout tools allow you to display or hide sections to customize the way the content is organized in the email. The Layout & Style menu contains the following tools:
- Pre Header: This section appears before the email content. It generally contains a link to view the hosted version of the email or a double opt-in / opt-out message.
- Header / Footer: These sections appear above and below the email body. They span the width of the entire email. The header generally contains a banner image. The footer generally contains the CAN SPAM address and opt-out or update links.
- Sidebar: Turning on the sidebar adds a second column to the email. The sidebar can be positioned to the left or the right of the email content. You can also adjust the sidebar width.
- Email Width: The default email width is 600 pixels for optimal viewing in the preview panes of all email clients. Use this layout tool to change the default.
- Email Alignment: Emails are aligned center by default. Use this layout setting to align it left if you want to mimic the layout of common email clients (e.g. Outlook)
- Show Form: This setting integrates with social sharing to turn a hosted email into a mini landing page with a form when viewed through a socially shared link (read related article.)
- Style: There are several standard styles available in the drag & drop email builder. You can use one of the built-in styles "as is" or use it as a starting point for creating a custom style. You can customize the colors used in various parts of the email using hexadecimal color codes, an eye-drop color picker tool, or use the built-in "Guess" feature (which suggests colors based on an image within the email, like a logo). The "Simple" style removes custom formatting to mimic an email sent through common email clients (e.g. Outlook)
-
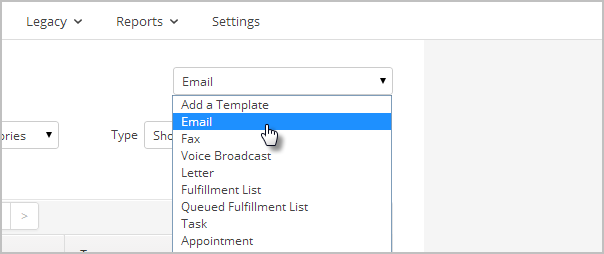
Go to Marketing > Templates
-
Select Email from the Add a template drop-down.
Template Draft: Whenever Max Classic detects a previously unsaved template, you will see this dialog. You can continue from a previous template, or simply click No, start from scratch.
-
Enter a Title
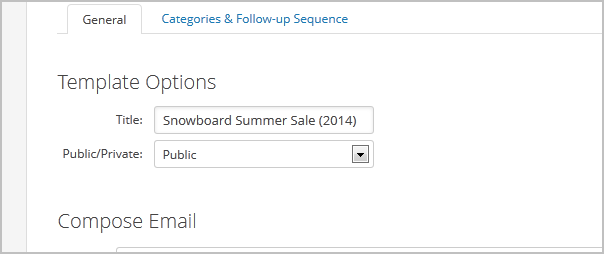
You will only see the title from within Max Classic. Title your templates in a way that will allow you to search and find them easily. Public/Private - If you set this to Private, only the user that created the email can access it.
-
Choose the From information

You can choose to send the email address from the contact's owner (most common), a specific user, or choose other to manually type the from name and email address.
-
Enter the email subject
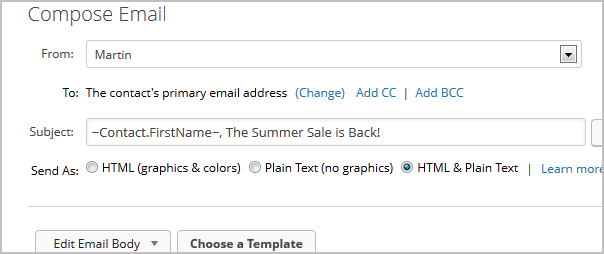
You can merge contact information into the subject line if you wish to personalize it. Just click inside the subject line where you would like to place the merge field, then click the merge button to choose the field you would like to merge.
-
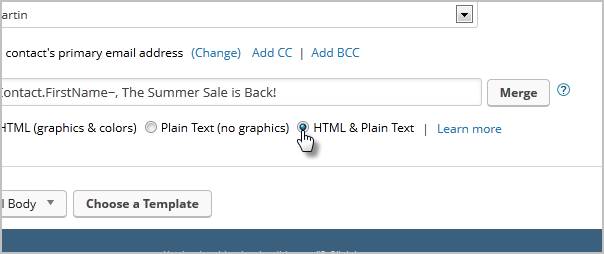
Select the type of email you want to send

- HTML (Graphics & Colors): Uses only the drag & drop builder to create the email.
- HTML and Plain Text: After you create the drag & drop version of the email, you will need to copy the message to the plain text builder. You will essentially be creating two versions of the same message.
-
Click on the Edit Email Body button.
-
Click on the Snippets tab at the top of the email builder.
-
Drag a banner snippet to the top of the email. If a banner is already there, you can change the image by double-clicking it and selecting a custom image from the drop-down or adding a new image. Note: Custom email banners should be no more than 600 pixels wide.
-
(Optional) Click on the Format tab and click the Layout & Style button to change the default one-column layout. You can add a sidebar, adjust the width, and turn on / off the pre-header, header, and footer. The updates take place immediately so you can review them as you work.
-
(Optional) While in the Layout & Style menu, click on Style to choose the colors used in the various parts of your email.
- Click on one of the standard styles to use it without modification.
- Click on Edit beside a standard style to use it as a starting point for your custom style. You can customize the colors using:
- Hexadecimal color codes
- The color picker tool (can pick colors from any image in your email)
- Guess: Click on an image and then on Guess. Max Classic will analyze the colors in the image and suggest a style each time you click on Guess.
-
Click on the Snippets tab again and drag them onto the email to add text, images, social media links, and more. Customize the content in the paragraph, article, and spotlight snippets and select or upload images.
-
Add automation links to text and images. Just highlight the text or click on the image you want to link and click the Link button on the toolbar. Note: You can only link the images in paragraph or article snippets.
-
Enter the address you would like to link to.
-
Select the Action from the drop-down (e.g. Apply / Remove Tag). Repeat as needed.
-
Click on the Save icon to save your changes.
-
Then click on the Preview button to review the email.
-
Click on the Close Builder button when you are finished customizing the template.
-
If you chose HTML & Plain Text you will need to copy the body of the email into the text box labeled, Plain Text Editor.
-
Check the Spam Score by clicking on the Update Score button. If the spam score is over 5, modify your email to reduce it. Emails scoring over 5 are more likely to go to the recipients' junk-mail folder (see related article.)
-
Mark the template as Ready and then click on the Save button to apply the updates to the template.
-
Click on the Save & Send Test button to send yourself a copy.


