Important Note: In Max Classic, appointments are currently in maintenance mode. We will bring Appointments to Ultimate soon, and will no longer provide support for Appointments in Max Classic.
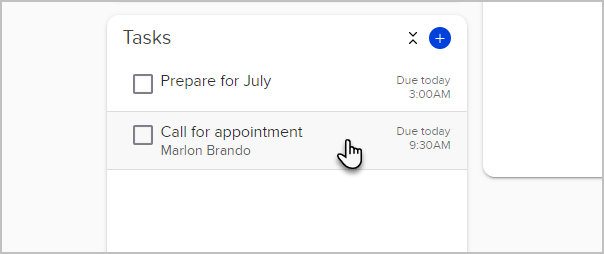
The My Day page consolidates tasks and appointments onto one page. With My Day, you can focus on one area of Keap to perform your daily activities instead of jumping around to various pages in Max Classic. The left panel contains tasks and appointments. The large panel to the right shows you the details of the tasks and appointments you select from the left.
Add a Task
- Click the plus button in the Tasks panel

- Enter the necessary information f or your new task

Edit a Task
- To edit a task in the working panel, click on a task in the left panel to select it.

- The task details will appear in the right hand panel, along with icons for Edit and Delete. Click the Edit icon in the right hand panel to bring up the edit task screen.

- The edit screen is the same as the creation screen.

Once a task has been edited and saved, the task remains selected in the list and the right panel displays the task details. If the due date has been changed, and the task no longer falls into the display criteria for the working tab, then the right panel will return to the default blank view.
Completing a Task
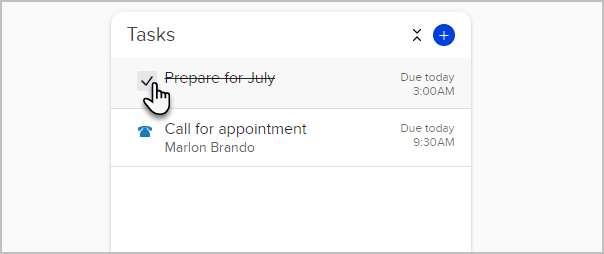
To complete a task, simply click the check box next to the task title. The task will be struck through. The completed task will be removed from the Working tab and archived in the Task Note Report under Admin > Reports.
For tasks that have legacy completion scenarios (outcomes) that trigger automation, a modal with scenario options is presented to you when the checkbox is clicked. You must choose a scenario and click Save to complete the task.
Once a task has been completed, the task details are presented in a read only state, and cannot be deleted or edited. If there is a contact associated with the task, and the contact record is showing, you will still be able to perform actions on the business card's action pane.
Manage Appointments
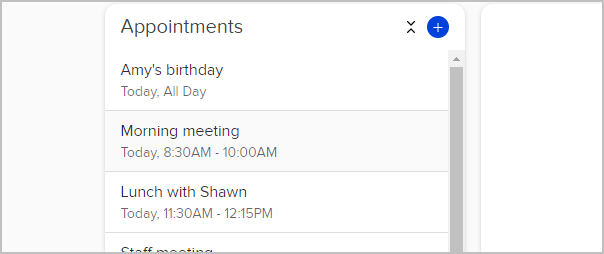
The Appointments panel on the My Day page displays your appointments for today and tomorrow. Each appointment includes:
- Appointment Title (Character limited to one line. If the title needs to extend beyond one line, it is shortened with ellipses. On mouse-over, a tool-tip will appear with the entire appointment title.)
- Start Time & End Time
- Location (only displays if you specify the location.)
- Attendee (only one attendee can be attached to an appointment.)

Appointments consist of the following elements:
- Title - The Title is required
- Contact (optional) - If the appointment is tied to a contact record, start typing the name of the person and choose the person from the drop-down list.
- Location (optional) - Enter in the name of the location of the appointment.
- Start Date/Time
- End Date/Time
- Description - Optional details that you can enter.
Manage Opportunities
The Opportunities panel on the My Day page displays your Opportunities for today and tomorrow. Each Opportunity includes:
- Opportunity Title (Character limited to one line. If the title needs to extend beyond one line, it is shortened with ellipses. On mouse-over, a tool-tip will appear with the entire opportunity title.)
- Due date: Will show you when the Opportunity is due
- Follow up Type: Type of Opportunity follow-up that is required.

Opportunities Consist of:
- Title: The title of the Opportunity
- Opportunity Action and Date: The type of Opportunity action along with due date will show up below the Opportunity Title
- Company: Company that the Opportunity's contact is associated with
- Phone 1: Phone number of the contact associated with the Opportunity
- Email: Email address associated with the contact of the Opportunity
- Person Type: Person type of the contact associated with the Opportunity
- State - Province (Billing): State of the contact associated with the Opportunity
- Contact quick menu: Menu that will allow you to quickly view information about the contact associated with the Opportunity. This includes: Notes, Tasks, Appointments, Emails, Orders, Tags, Forms, Campaigns, Opportunities, and Score.


