You can use the import tool to mass update a list of contacts. For example, you may need to add different country information to all of your existing contacts.
You can export a list, add each person's country information to it, and then import it back into Keap to update your existing contact list. The Keap Contact ID must be included in the export and the updated import file.
WARNING! The new information will permanently overwrite existing information in the updated field(s). The only exception is the Contact Notes field; this field can only be appended to. Updates performed through the Import tool cannot be reversed. Make sure you preview the field matching before you complete the import. This will not delete/remove tags.
Important things to know
- You can NOT use a Modify Existing Records to delete information. Empty fields will be skipped
- You can NOT overwrite the Lead Source field using Modify Existing Records.
- Never match fields to the "Your Systems Contact ID"
Instructions
- Go to Admin > Data Cleanup in the main navigation menu.
- Click on Modify Existing Records. Select the data type and click on Go.
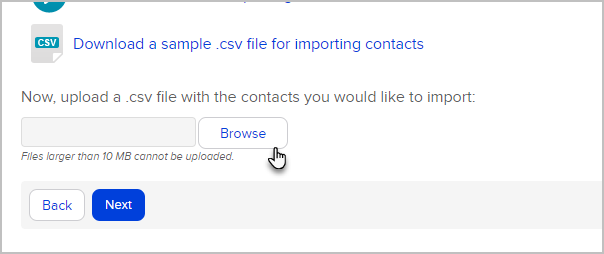
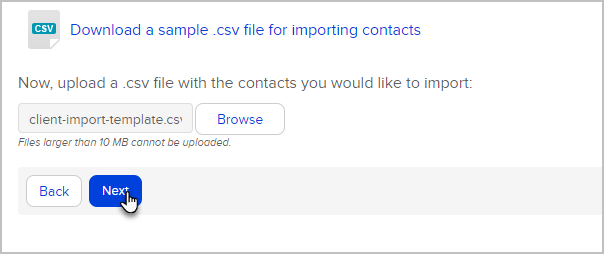
- Click on Browse to select a csv file from your computer.
- If you previously imported a similar file and chose to "Save the Import", you can choose this option and it will load the same field matching rules so you don't have to match the fields a second time. This can save you a lot of time if you are frequently importing csv files from other systems. A "Saved Import" is just a saved set of matching rules from a previous import.

- Click on Next to start the import wizard.
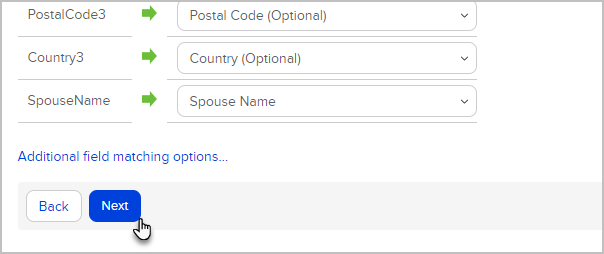
- Match the fields. The ID Field must match with the Keap ID Field. The field name from your spreadsheet is on the left column. The Keap field name is on the right. Select the matching Keap field from each drop-down. If a matching field is not listed, you can create a custom field or select Do not Import this field to omit the field from the import.

(Optional) Match field values for the multi-choice fields (e.g. drop-downs or select lists). Select a matching Keap field from each drop down. If you need to populate multiple Keap fields with data from one spreadsheet, click on the Additional Field Matching Options link at the bottom of the page.
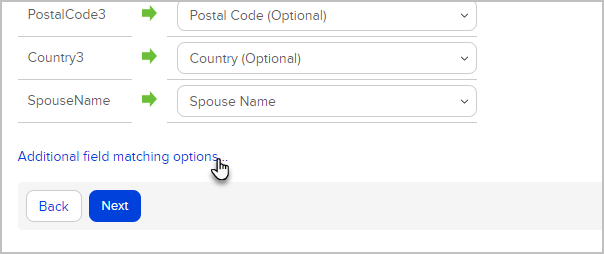
- Click Next when you have finished mapping your fields.


- Contact ID: Make sure NOT to match the Keap Contact ID to the System Contact ID. This will not update any records but will only skip the import.
- Tags: Use Create tags from your fields values even if the tag already exists in your app.
- Create a Corresponding Company Record: You can mark the checkbox to create company records for every contact that has a company name in the company field. Please note that any spelling variation in a company name will create multiple companies records. For example, Keap and Keap Software would create two separate companies
- Run some Actions: Apply/Create multiple tags and other Actions Sets